
Gingerbread Scented Salt Dough Ornaments: DIY Snowflake Ornaments
- Jessie

- Nov 30, 2024
- 6 min read
Updated: Oct 23, 2025
All art projects & crafts require adult supervision. This post may contain affiliate links. Read our full disclosure policy.

Add a little sparkle and a whole lot of cozy Christmas cheer to your home with these Gingerbread Scented Salt Dough Ornaments: DIY Snowflake Ornaments! This festive craft combines the charm of homemade salt dough with the warm, comforting scent of gingerbread spices. The result? Beautiful, handmade gingerbread snowflake ornaments that look just as magical as they smell! Whether you’re decorating your tree, gifting handmade keepsakes, or crafting with your kids on a snowy afternoon, this simple project fills your home with creativity, joy, and the sweet scent of the holidays.
This gingerbread salt dough recipe is quick, easy, and fun to make with kids of all ages. Using a few pantry staples—flour, salt, water, and warm spices like cinnamon, ginger, and nutmeg—you can mix up a batch of fragrant salt dough that’s perfect for rolling and cutting into festive shapes. For this craft, we’re using snowflake cookie cutters to create beautiful, delicate ornaments that celebrate the magic of winter. Once dry, your ornaments will have a rustic, gingerbread-like color and can be decorated with paint, glitter, or white puffy paint to resemble icy snowflakes.

Parents and teachers love this DIY Christmas ornament craft because it’s hands-on, budget-friendly, and full of sensory fun. Kids will love kneading the dough, smelling the cozy gingerbread scent, and watching their snowflake ornaments take shape. This project is a perfect combination of art and science—teaching kids about measuring, textures, and creativity—all while keeping them engaged in a festive, screen-free activity.
These gingerbread-scented snowflake ornaments also make wonderful handmade gifts. Once dried and decorated, you can tie them with twine or ribbon and hang them on the Christmas tree, use them as present toppers, or bundle them into gift bags for friends and family. Their sweet aroma and handmade charm make them the kind of keepsake people will treasure for years. You can even personalize each ornament with initials or the year to turn them into a memorable family tradition.
This DIY Gingerbread Salt Dough Craft is perfect for classroom art projects, holiday parties, or a cozy family craft night. It’s easy to make in batches, and every snowflake turns out unique—just like the real thing! Add white paint or glitter to mimic glistening snow, or leave them natural for a rustic gingerbread look. The rich brown color from the spices and the sweet scent make these ornaments stand out as a festive twist on the traditional salt dough recipe.


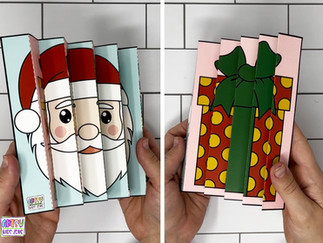


If you love this project, be sure to check out all of the other fun Christmas crafts for kids on the blog! Make a magical Nutcracker Snow Globe, design your own Paper Stocking that actually holds goodies, or try the Santa and Present Agamograph, where Santa appears as you tilt the picture. Don’t miss the Crayon Resist Stocking Craft or the Santa Cootie Catcher—each one is easy, festive, and full of Christmas creativity! Every craft is designed to bring families together through hands-on fun and holiday imagination.
These Gingerbread Snowflake Ornaments aren’t just a craft—they’re a memory in the making. The process of mixing, rolling, and decorating fills your home with laughter and the irresistible scent of gingerbread. When the ornaments are finished and hanging on the tree, they’ll serve as a sweet reminder of the time spent creating them together. It’s a simple project that captures the heart of the season—warmth, creativity, and togetherness.
So grab your mixing bowl, roll out your dough, and get ready for some snowy, gingerbread-scented fun! These Gingerbread Scented Salt Dough Snowflake Ornaments are easy to make, smell amazing, and add the perfect handmade touch to your holiday décor. Whether you make them for your own tree or to share as gifts, this cozy Christmas craft is sure to become a family favorite year after year.
Materials You'll Need For The Salt Dough Mixture:
2 cups all-purpose flour
1 cup salt
1 cup water
1/2 cup cinnamon
1 TBS Ginger
1 TBS Clove
Additional Materials:
Rolling pin
White Puffy Paint
Snowflake Cookie Cutter
Fine White Glitter
Baking sheet
Parchment Paper
Salt Dough Instructions

Step 1: Prepare the Salt Dough for the Ornaments
Involve your kids in the culinary fun by letting them measure and mix the ingredients together. In a mixing bowl, blend the flour, salt, cinnamon, ginger, and cloves.
Pro Tip: This presents a fantastic opportunity for your little ones to practice their kitchen skills. The forgiving nature of this salt dough recipe allows room for error, making it a great learning experience. Even if the measurements are a tad off, the dough is likely to turn out just fine. Share the trick of getting an exact cup of flour by slightly overfilling the cup and using a butter knife to level off the excess – a handy kitchen tip!

Next, gradually add water while stirring until the mixture forms a dough. Knead the concoction until it achieves a smooth, pliable texture. The infusion of cinnamon not only adds a delightful scent but also imparts a gingerbread-like appearance to the dough, enhancing the sensory experience of this creative culinary adventure.

Step 2: Roll Out Salt Dough
Preheat your oven to 220°F. On a flat surface, roll out the salt dough to approximately ¼ inch thickness. I found putting a piece of parchment paper below me worked best. It made it easier to transfer the ornament to the baking sheet. Take a snowflake cookie cutter and carefully cutout each snowflake.

Using a straw, carefully punch a hole in the top of the snowflake. This will create the hole that will allow the ribbon to go through it in the last step.

Step 4: Bake and Dry
Carefully transfer the snowflakes to a baking sheet and place them in the preheated oven. Bake for around 2-3 hours until completely dry and hard. Keep an eye on them to avoid burning. Let them cool to room tempature before handling.
Pro Tip: Here's a little trick to maintain the vibrant brown color of your dough: if it loses some of its richness while baking, fear not! Once the dough has cooled to room temperature, take a moment to rub canola oil over it. Allow the oil to soak in and dry, revitalizing the color and ensuring your handprint turkeys look as charming as ever.

How To Decorate Snowflake Salt Dough Ornaments
Now comes the exciting part of the process! Once your snowflakes have cooled, it's time to draw the snowflakes white lines with puffy fabric paint. If you haven't experienced the joy of working with puffy paint, get ready for a delightful treat. This unique paint adds a three-dimensional effect to your artwork, creating a thick layer where applied. Watch as your snowflakes come to life making each uniquely festive and ready to stand out in your Christmas decor.

Carefully draw snowflake lines with the white puffy paint. While the paint is still wet, sprinkle white glitter on top it. Let the the paint completely dry before moving on to the next step. Expect it take a one or two days to completely dry. Drying time does vary depending on how thick you layered the paint on the snowflake and room temperatures.

Once dry and fully decorated, tie a piece of ribbon through the hole. and then your snowflakes are ready to be displayed. Hang them as ornaments, arrange them on a mantel, or use them as part of your Christmas table centerpiece.
Preserving Salt Dough Ornaments for the Long Haul
For ensuring the longevity of your dried creations, consider applying a layer or two of Mod Podge or using a protective sealer. Both methods work effectively. It's advisable to coat or seal both sides of the ornaments—apply on one side, allow it to dry, then repeat for the other side. If opting for a sealer, it's best to carry out this task in a well-ventilated area and away from children.
Pro Tip: When storing these ornaments between festive seasons, wrap them carefully in bubble wrap for added protection. Place them in a sturdy container that prevents excessive movement, avoiding exposure to moisture or potential impact. This way, your ornaments can be safely stored and cherished for years to come.


If you loved making these Gingerbread Man Ornaments, there’s a whole world of creative fun waiting for you on the blog! Explore even more kids’ crafts like the adorable Penguin Origami Craft, the colorful Rainbow Fish Craft, where you use tinfoil to transfer washable marker designs and create a bright rainbow effect, or the roaringly fun Lion Paper Bag Puppet that’s perfect for pretend play. And when you’re ready for a wintery twist, learn how to make beautiful Coffee Filter Snowflakes that look just like real ones—no two are ever the same! Each craft is simple, hands-on, and full of creativity, making it easy to keep kids inspired and crafting all year long.


Comments